File->New->Project... menu. Then we
can see a dialog box as shown in Figure 5.3. We
assume to create Console Application at DEVSsharp\Examples.
The location we want to create new project can be selected by
[Browser...] button. The new project is titled as
MyProject.
Then we can see the window screen of Visual Studio 2005 after creating
MyProject as shown in Figure 5.4.
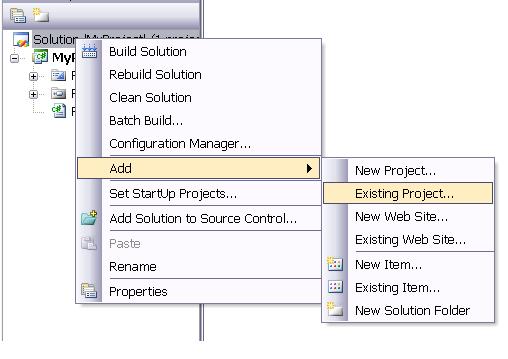
DEVSsharp library, we should add it by clicking right mouse
button to `MyProject' at Solution Explorer and then select context
menu through Add->Existing Project... as shown in
Figure 5.5. A file selection dialog will pop up,
so we will select DEVSsharp\DEVSsharp.csproj that is the
project file of DEVSsharp.
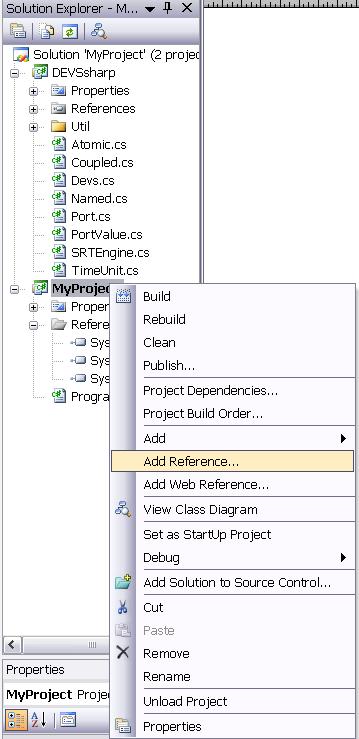
DEVSshap project to MyProject as a
reference. To do this, first left-button click MyProject at
Solution Explorer and then select title menu of
Project->Add Reference... or right-button click for
context menu of Add Reference....
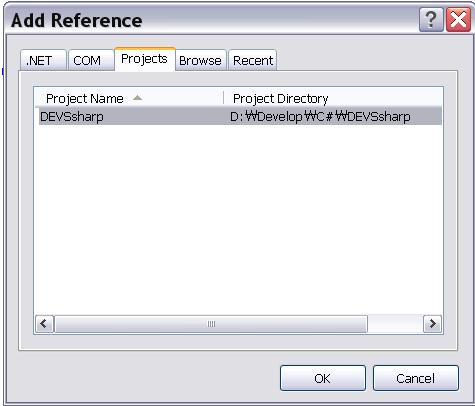
We can see a dialog box titled as Add Reference as shown in Figure
5.7. We select Projects tab and select
DEVSsharp and press OK button. Then MyPoroject's
References at Solution Explorer becomes to contain
DEVSsharp.
The following codes shows a simple example which are mainly copied
from Ex_Timer project. Don't forget to add the statement of
using DEVSsharp.
    using System;
    using System.Collections.Generic;
    using System.Text;

    using DEVSsharp; //<-- Don't forget add this statement

    namespace MyProject
    {
        public class Timer : Atomic
        {
            private OutputPort op;

            public Timer(string name)
                : base(name, TimeUnit.Sec)
            { op = AddOP("op"); init(); }
            public override void init() { }
            public override double tau() { return 3.3; }
            public override bool delta_x(PortValue x) { return false; }
            public override void delta_y(ref PortValue y) { y.Set(op); }
            public override string Get_s() { return "Working"; }
        }

        class Program
        {
            static void Main(string[] args)
            {
                Timer timer = new Timer("STimer");
                SRTEngine Engine = new SRTEngine(timer, 10000, null);
                Engine.RunConsoleMenu();
            }
        }
    }
![\includegraphics[scale=0.15]{NewPrj}](img190.gif)
![\includegraphics[scale=0.2]{MyPrj}](img191.gif)